Wednesday 16 October 2013

Assignment 3 - Review

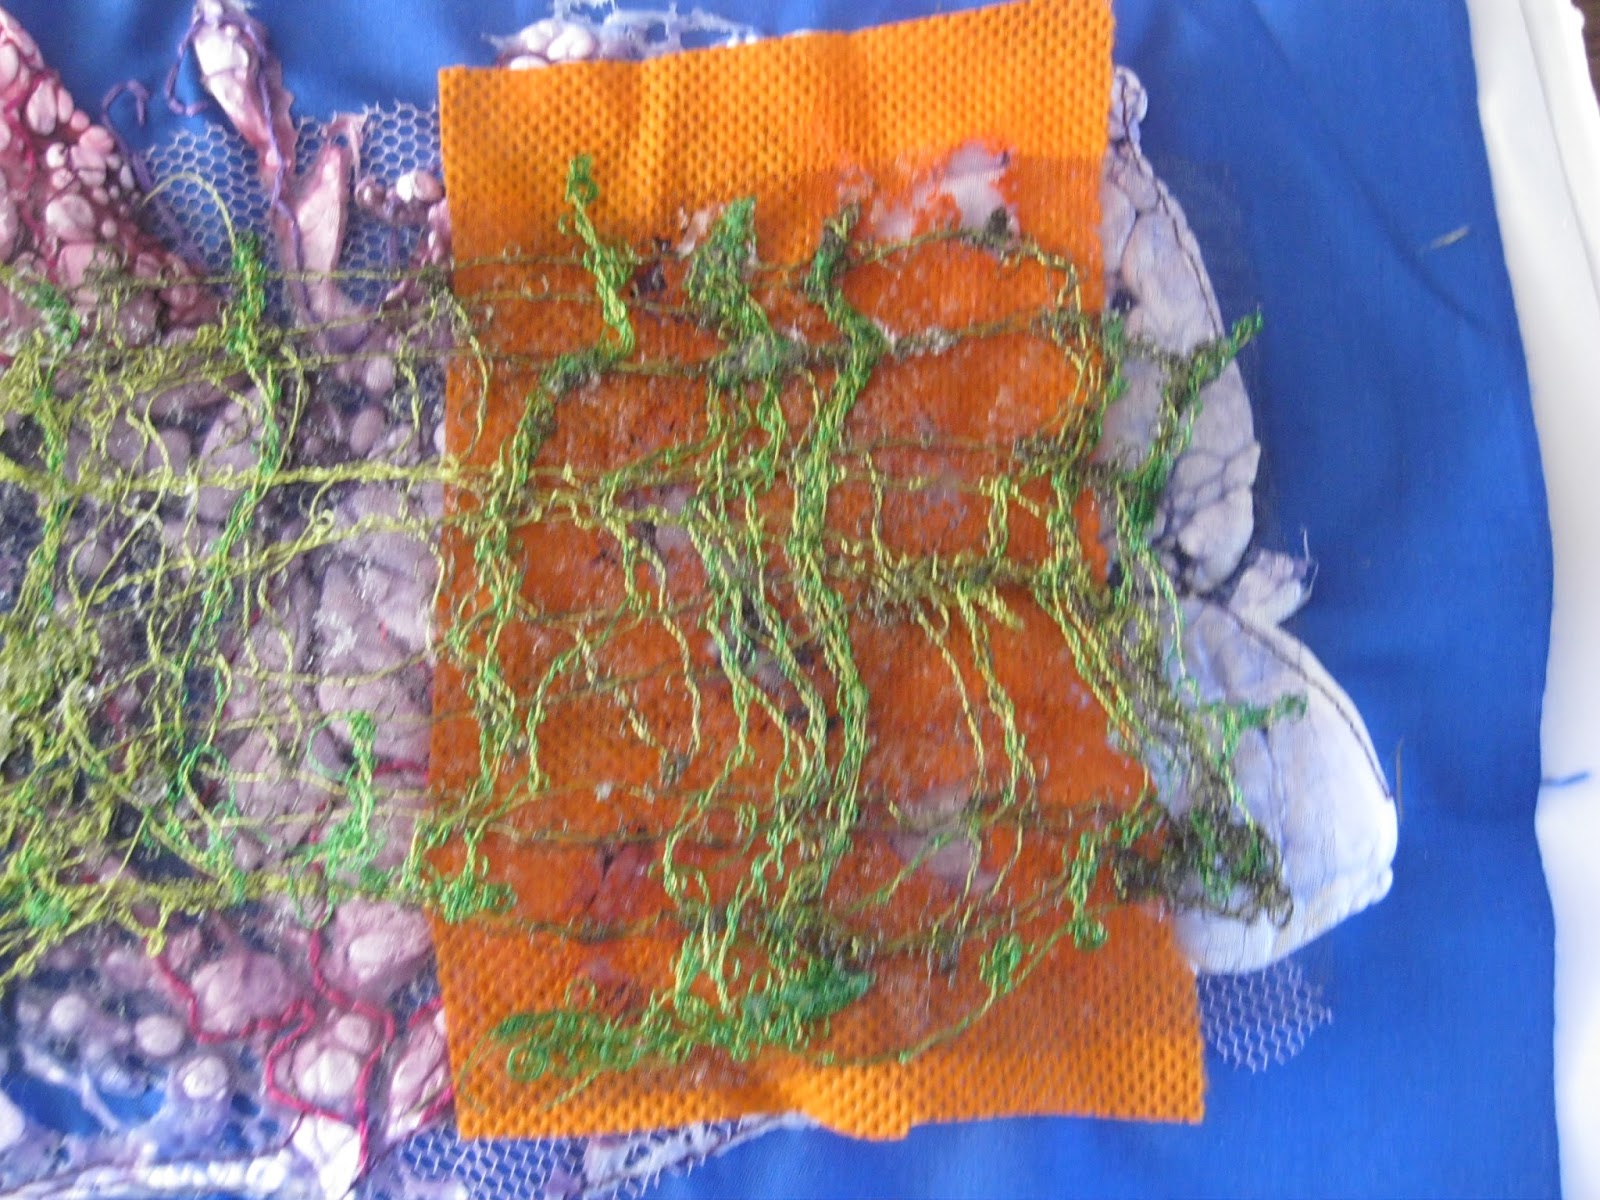
Firstly do I feel that my finished samples fulfilled my expectations and fully explored the topic of reveal and conceal, light and transparency. Yes I do feel that my sample fulfils my expectations, although I would have liked to have worked on the tree sample a little more and push the idea examining overlay the image, using different coloured lights. I feel that I did explore the topic reveal and conceal fully but could have examined light and transparency more. In all my sample I made sure I was always thinking about the brief and whether my sample was about revealing, concealing or light and transparency. I do feel that there is a lot more that I could explore on this topic. I am really happy with the other two samples that I produced. I think the concealed sign really worked well and I would like to do more work on this in my sketchbook at some time as I love the way the letter are concealed. I feel the seaweed sample is really fun especially the netting technique used for the seaweed. I would like to explore the way seaweed can be more transparent when exposed to light.
 
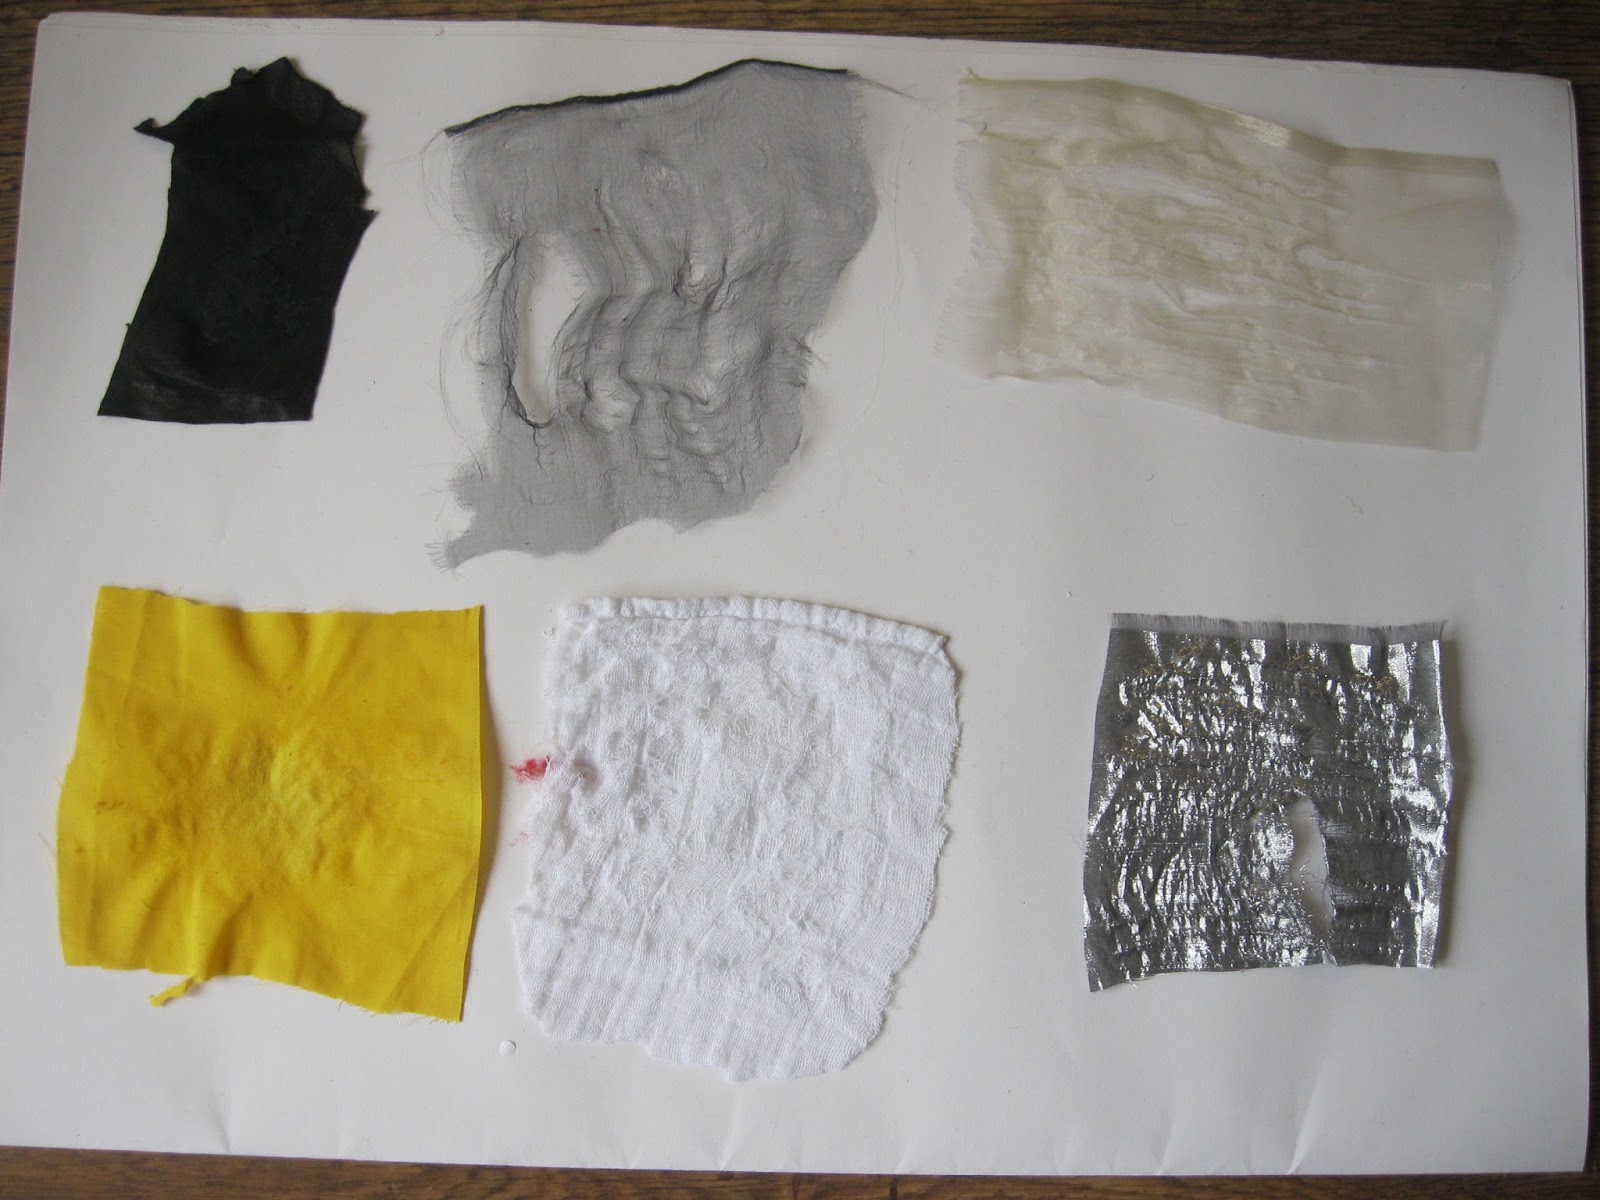
When choosing the materials, I was thinking more about the effects that I wanted to achieve and whether the sample was reveal or conceal then I looked at the quality. 
 
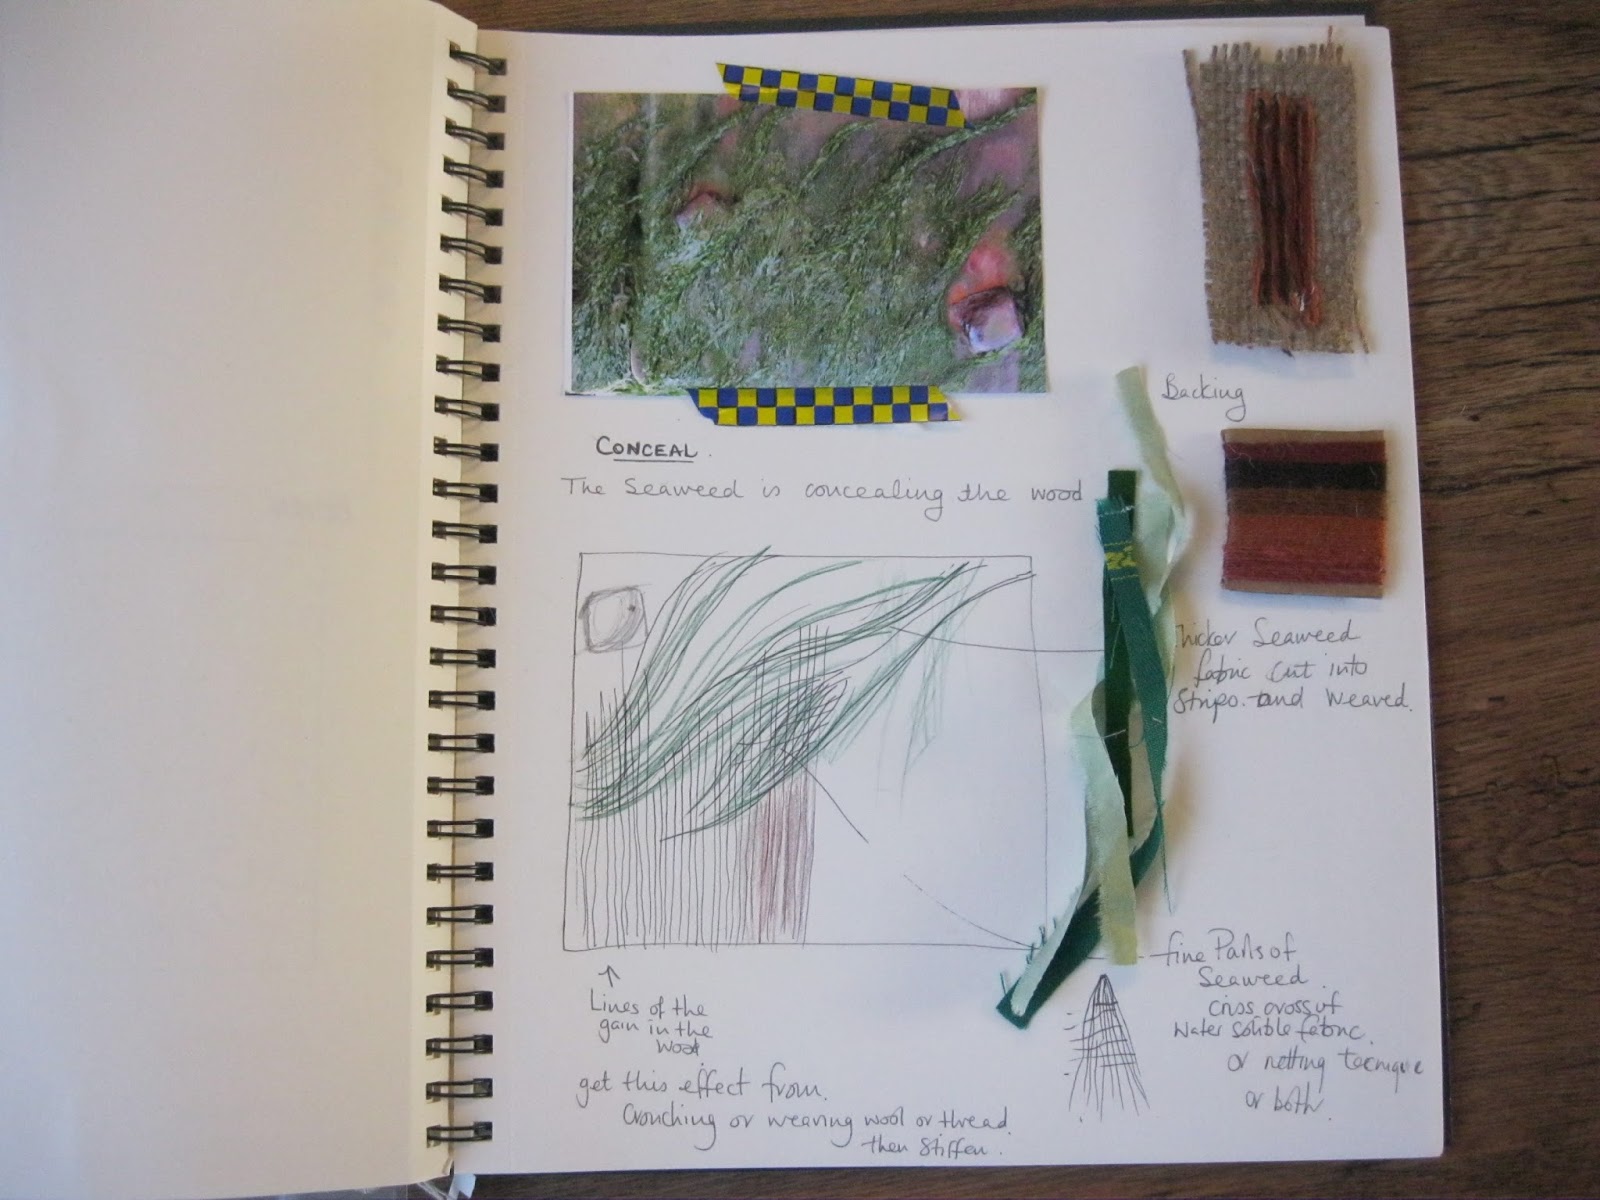
Once I had chosen my image /ideas. I then referenced back to my sample and found the techniques that would give me the effect that I was looking at achieving and then looked at what material I wanted to use.
 
I really enjoyed this assignment and as usual wish I could have dedicated more time to explore the subject more. I enjoy the process of creating images using different technique and fabrics. Also exploring what I can do with different fabric.
 
I am really enjoying this course but it is unfortunate that I have had to rush some of my work because of other commitments. I am hoping that I can spend more time on the last two assignments and do a lot more work in my sketch book as I am still lacking in this area.


Tuesday 15 October 2013

Assignment 3 - Stage 4 & 5

I then Started on finding some images that I thought would work for the reveal and conceal theme, here are some of the photos that I took.

 
I took the photo of the church as I like the refection in the glass and I thought the post was interesting.


 I thought the flaking paint would be interesting for revealing, I thought the different colours and shapes were interesting.

Then I came across these sign, The paint was cracking and flaking off and the dirt and moss was concealing the words.


I was looking into the garden and the eucalyptus tree at the top of the garden jumped out at me. It was beautiful against the blue sky and I felt the as a silhouette is would be a wonderful image to use.

 
I also had some old photos that I took of seaweed on water breaks.


So I chose a couple of images and came up with some drawing and ideas.

This sample was more about the silhouette, I wanted to use the idea of Reiko Sudo if cutting into paper and the burning hole samples. I chose a transparent fabric so that light can shine though and create a shadow against the wall. I also chose a light weight fabric as it will move when hung and the image will sway like a tree does.


Here is the silhouette that the sample creates


I then look at the sign and wanted to look a concealment and the way the letter are conceal by the moss growing on the sign. I used different technique that I had learnt from the workshops to create the final sample.


Lastly I used the Seaweed photo that I had of seaweed concealing a water break on the beach. I used the netting techniques to create the seaweed as well as sewn water soluble fabric and a little platted laminated fabric for a bit of structure.


Assignment 3 - Experimental workshops

I wasn't sure which workshop I wanted to do so I just picked any to get me started. So I started with workshop 1 - netting techniques. I started of with simple weaving threads. I then did another and added beads to make it more interesting. I then moved on to using ribbon and a thick fabric to see what interest I could create with this.


Netting is a great technique that can conceal a background with interest. There are many pockets that can be look through or concealed.
 
I then looked at workshop 5 and dug out my laminator. I chose this workshop as I felt that the transparency that could be created would be interested.
 
 
These are my first sample I was just looking at transparent and thicker fabrics together.


I then trapped some found objects, I loved the feathers.
 
 
I then experimented with cutting laminate up and sewing it together. I just tried to do a scattered feel.
 
 
I looked at images of stain glass windows and the effect of stain glass windows when light was shined through and then did this sample.
 
I then looked at trapping gather fabric in the laminator, a gather fabric has become 3 dimensional and I thought that it would be interesting to make it 2 dimensional again and see the lines created. Then I moved on the cutting holes in the laminate and pulling the fabric through.


I then moved onto Workshop 6. I really enjoyed this workshop. Some of the samples were more successful than other. I used many different techniques to create a different effect with the fabric.
 
 
Above I used Painted Tyvek fabric that was melted and then sewn onto fabrics, trapped treads between transparent fabric, sewn water soluble fabric, sewn paper that is cut to reveal what was underneath, and the last sample that was sewn and then the layers of transparent fabric was melted.  

 
In these samples I experimented with melting plastic bags.

 
In these samples I weaved ribbon, again melted fabric and trapped scraps of fabric to create a new fabric.
 
Lastly I looked at workshop 7 Deconstructing fabrics as I felt that these techniques would work well with workshop 6. I decided that I would chose a number of different techniques to deconstruct the fabrics and try it out on different fabrics to see how the different fabric reacted.
 
These first sample have been melted with a heat gun.
 
 
These samples were melted with a soldering iron. I was able to have more control of where the burn happened.
 
These samples were created using a hole punch and sand paper. The sand paper soften some of the fabrics.


 These samples are fraying the edges and using a cheese grater to distress the fabric.

 
These were distressed using scissors. I found that on some thicker fabrics the scissors soften the fabric.

 
I pulled threads out of these fabrics.


I then looked at overlaying some of my samples to see what effects were created and using like with some of the samples:


Here are some of the experiments I did with light. They did not come out very well as I was using a torch.